Showing posts with label showgirl. Show all posts

Monday, 13 February 2017

Amethyst Aspirations


February is well on it's way! It's still technically summer here in New Zealand but the weather hasn't been that consistent, so it helps looking at pretty things, kicking off our birthstone/rhinestone monthly mood boards with Amethyst Aspirations


We absolutely love the KTB photo set of Alyssa Kitt in her custom Flo Foxworthy "Lilac Moon" costume, she toured with this stunning act throughout Australia in the Australian Burlesque Festival, and we were very lucky to see it in action here last year when she performed in New Zealand. I'll do a February spotlight on this costume as it's so detailed and spectacular!


Fires Waltz, the latest Haute Couture Spring Summer 2017 from Zuhair Murad. With the quote "An explosion of coloured light cloaked with the darkest night, then reflected in the shadowy waters below."

Photo and blog by Blushaholic
This lipstick and glitter combo from Blushaholic using Lit Cosmetics Deja Vu cosmetic glitter that we sell on the Foxworthy website. add it to your everyday and performance makeup, nail polish, crafts...life.


The vibes of classic showgirl, Sheree North, in her outrageous routine from 1955 film" How To Be Very Popular". I think I've done a few of these moves, and I might just steal some more!


Other exciting things this month are the Showgirl Markets that we're taking part in together with Venus Starr's School of Burlesque and Studio L'amour in our new location. We're also running a couple of classes alongside selling costumes and some of our stash! Visit our Facebook page for more info.


Happy Birthday to all the February babies!

xx

Saturday, 9 February 2013

Making ostrich feather fans with acrylic staves

Tutorial - How to make ostrich feather fans
I often receive emails from people wanting to know how to make their own ostrich fans, so I thought I'd post this tutorial showing how I construct fans using the acrylic staves I design and sell here.

Instructions for constructing Ostrich feather Fans using Flo Foxworthy acrylic staves.


Please note that this page is very image-heavy.

Step 1:

Prepare your fans by selecting 12 ostrich feathers (per fan) and ensuring they are the same length. Trim the end of the quill if necessary using heavy scissors or side cutters/bolt cutters.
Your fan staves come with all the necessary nuts, bolts, washers, cable ties and nylon thread.


Step 2:

Clean the rhinestone inlay holes with isopropyl alcohol or a similar product (rubbing alcohol or vodka will do the trick!). Be sure to wipe the stave thoroughly with a clean rag after cleaning to remove any residue.  This is to ensure the glue has a clean surface to adhere to, to prevent the rhinestones from falling off.


Step 3:

Use a toothpick or chopstick to apply rhinestone glue to the back of each stone, and place rhinestone on the stave.  It helps if you hold the stone with a pair of tweezers while you apply the glue.
The best glue for the job is 5-minute epoxy (available at any hardware store). Follow the glue manufacturer's instructions and wait till the glue is completely dry before proceeding to the next step. If you don't have 5-minute epoxy then E6000 is also a good choice.

Step 4:

Repeat Step 3 for each stave. There are 12 staves per fan, with six rhinestones on each stave, so you'll need 144 rhinestones (1 gross) size ss30.


Step 5:

Use a yard stick or metre ruler to ensure each feather and stave are equal in length. The measurement from the tip of the feather to the end of the stave should be the same for each piece.
Hold the feather in place, with the stave on top (feather curling downwards) and proceed to step 6.


Step 6:

Use a small cable tie (in a colour to match your staves) and loop it through the holes on either side of the feather. Close the cable tie on the feather side and pull tightly, so the feather can't slip out.  Cable ties can be purchased from any electrical supply, hardware or computer store.  You can also use thin wire if you prefer.


Step 7:

Loop a second cable tie through the top holes and fasten it as for step 6.  Repeat for each stave.


Step 8:

Clip the ends off all the cable ties using scissors or side cutters.


Step 9:

Slide one washer onto a bolt, then slide a stave on (with the rhinestones facing down).
Now alternate each stave with two washers till you have used twelve Staves.  If there is still space at the end of the bolt, then you can add a few extra washers between the staves at either end.
Place one final washer on the end of the bolt after the last stave, and attach the nut.
To finish, screw on the locking nut (with the nylon centre), and tighten the locking nut on each bolt as tightly as you like. It may help to use a pair of pliers to hold the nut while you use a screwdriver to tighten the bolt.
The tighter the nut, the more firmly your fan will stay open. The looser the nut, the more easily your fan will open and close.


Step 10:

Lay out each fan, ensuring that the staves are spaced equally – anywhere between 90 - 180 degrees ( semi-circle) depending on your preference.
For left and right hand fans, lay out each fan side by side, so the top staves are pointing to each other.

Step 11:

Thread the nylon fishing line through the hole in one side of the first stave, where the lower cable tie is attached. Tie the fishing line in a secure knot, then thread it through the matching hole on the next stave.
Tie securely and repeat this step till you've tied the fishing line through each stave and your fan is strung together.
It's a good idea to put a drop of superglue on the knot at the beginning and end of your fan string, to prevent the knot from coming undone.  Try not to get any superglue on the fan stave, as it can leave a cloudy mark.

Make sure that you tie each stave together at an equal distance.
Test your fan by closing it – does it fold up correctly? If your fan doesn't close fully, then you may need to remove the fishing line and tie it again, leaving a slightly wider gap.

Your Ostrich feather fans are now ready to use!
Baby pink ostrich feathers, white staves & Swarovski rose ab rhinestones

Thursday, 3 January 2013

Looking back on 2012 - the competition was fierce!

Imogen Kelly (Australia)

Congratulations Ladies!


In 2012 I had so much fun seeing some of my beautiful clients winning various titles while wearing costumes I'd made for them.

Burlesque Grand titles:

Imogen Kelly - Miss Exotic World & Reigning Queen of Burlesque 2012

Briana Bluebell - Miss Burlesque Australia 2012
(Corsets made by Flo and embellished by Briana)


Briana Bluebell (Australia)


Alethea Austin (USA)


Fitness titles:

Alethea Austin - 1st runner-up US Pole Dance Federation championships 2012
(Bra & Shorts made by Flo, then embellished by Crystal Dancewear)

Lou Macdonald - NZ International Federation of BodyBuilding 2012 1st Short Bikini and 1st Over-all Bikini

Lou Macdonald (New Zealand)


I've already begun work on costumes for some of 2013's competition entrants, and I can't wait to see what the year brings for them!


Friday, 17 August 2012

Matchless Snaphots Photography

Matchless Snapshots (Australia)

Featuring costumes by Flo Foxworthy

Strawberry Doll (AU) photographed by Matchless Snapshots (AU)
One of my favourite Australian photographers is Rachel Mia @ Matchless Snapshots.  Her work is clean and crisp, with a very feminine aesthetic.
This first image is from a recent shoot with Strawberry Doll, and features a pair of ostrich feather fans which i made for Rachel earlier this year.  The fans are hand-dyed a lovely shade of peach and have white acrylic staves with Swarovski crystals in the pretty shade of Hyacinth AB.

Amelie (AU) photographed by Matchless Snapshots (AU)
This second image is from a shoot Rachel did with Australian burlesque performer Amelie.
The Poison Ivy costume is one I made earlier this year for Amelie when she entered Miss Burlesque Australia 2012.
I've already featured other photos from this shoot in a previous blog post, but i just couldn't resist posting this new image - i love the clean background, it really brings out the colours of the costume (and Amelie's stunning red hair!).

For more about Matchless Snapshots:
www.modelmayhem.com/712425
www.facebook.com/matchless.snapshots

For Strawberry Doll:
www.facebook.com/StrawberryDoII

For Amelie:
www.facebook.com/amelieburlesque

Monday, 11 June 2012

A costume fit for a (burlesque) Queen!

A HUGE congratulations goes out to Australia's Imogen Kelly for being crowned "Reigning Queen of Burlesque" at the Burlesque Hall of Fame 2012 in Las Vegas last weekend!This is a huge honour in the burlesque world, you could say it's like winning the award for Best Picture at the Oscars! 

I am delighted to say that Imogen was wearing costume pieces made by me underneath her extravagant feathered costume, head dress and boa (not made by me). 
For Imogen, I made a Bra and Panty set covered in baby pink beaded fringe with Swarovski rhinestone embellishment:

The bra was front-fastening, and the Panties had a keyhole at the back for a cheeky peek-a-boo effect.

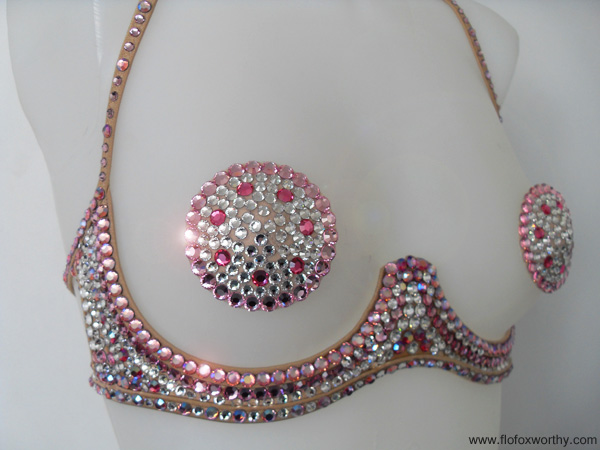
Worn under the Bra and Panties was a Dlite G string with matching Pasties and a Sandrina (a classic burlesque costume style - essentially an underwire Bra without cups). 

Each item was made in a medium beige lycra and heavily embellished with Swarovski rhinestones in the following colours: Crystal, Light Rose, Light Rose AB, Rose, Rose AB
I'll post a link to Imogen's award winning performance as soon as it's available online!  In the mean time, go and check out some of her other acts on youtube: www.youtube.com/user/Imogenkelly/videos  and visit her website: www.imogenkelly.com.au

Saturday, 5 November 2011

For my first post - new photos!

I had time today to sit down and look at the proofs from a photo shoot i did last weekend with NZ burlesque performer (and NZ's first 2011 BHOF entrant!) Miss La Vida from Auckland. 
The photographer was Amy Jacobs (Wgtn NZ) and the makeup artist was Emily-Jane Appleton Sturrock.

I couldn't be happier with the results, there were too many fantastic images to choose from!  Here's a sneak preview:

I love the iridescent sheen of the navy blue fabric, it really catches the light beautifully.
You can't really tell from the photo, but there are a few hundred Swarovski crystals around the hem and sleeves, as well as trimming the front edges of the robe.
Miss La Vida is also wearing a deluxe Dlite G string in a Medium Nude shade, covered in Swarovski crystals (Light Colorado Topaz - a very good nude colour).

We also photographed Miss La Vida with the double layer Prima ostrich fans which i made for her earlier this year.  Each feather is tipped with 5 clear Swarovski crystals, and the staves are glossy black inlaid with clear crystals. The sparkle that reflects off these fans is gorgeous!

I'll be posting the best photos from the shoot on my website next week, click here to visit my photo Gallery